Connecting Zerodha as Your Broker
Connecting Zerodha takes fewer steps than brokers that use API credentials. Zerodha uses a secure login redirect, so you sign in on Zerodha's own screen and come straight back to Markup once verified.
Step 1: Start the Connection
On the Broker Settings page, select Connect Broker.
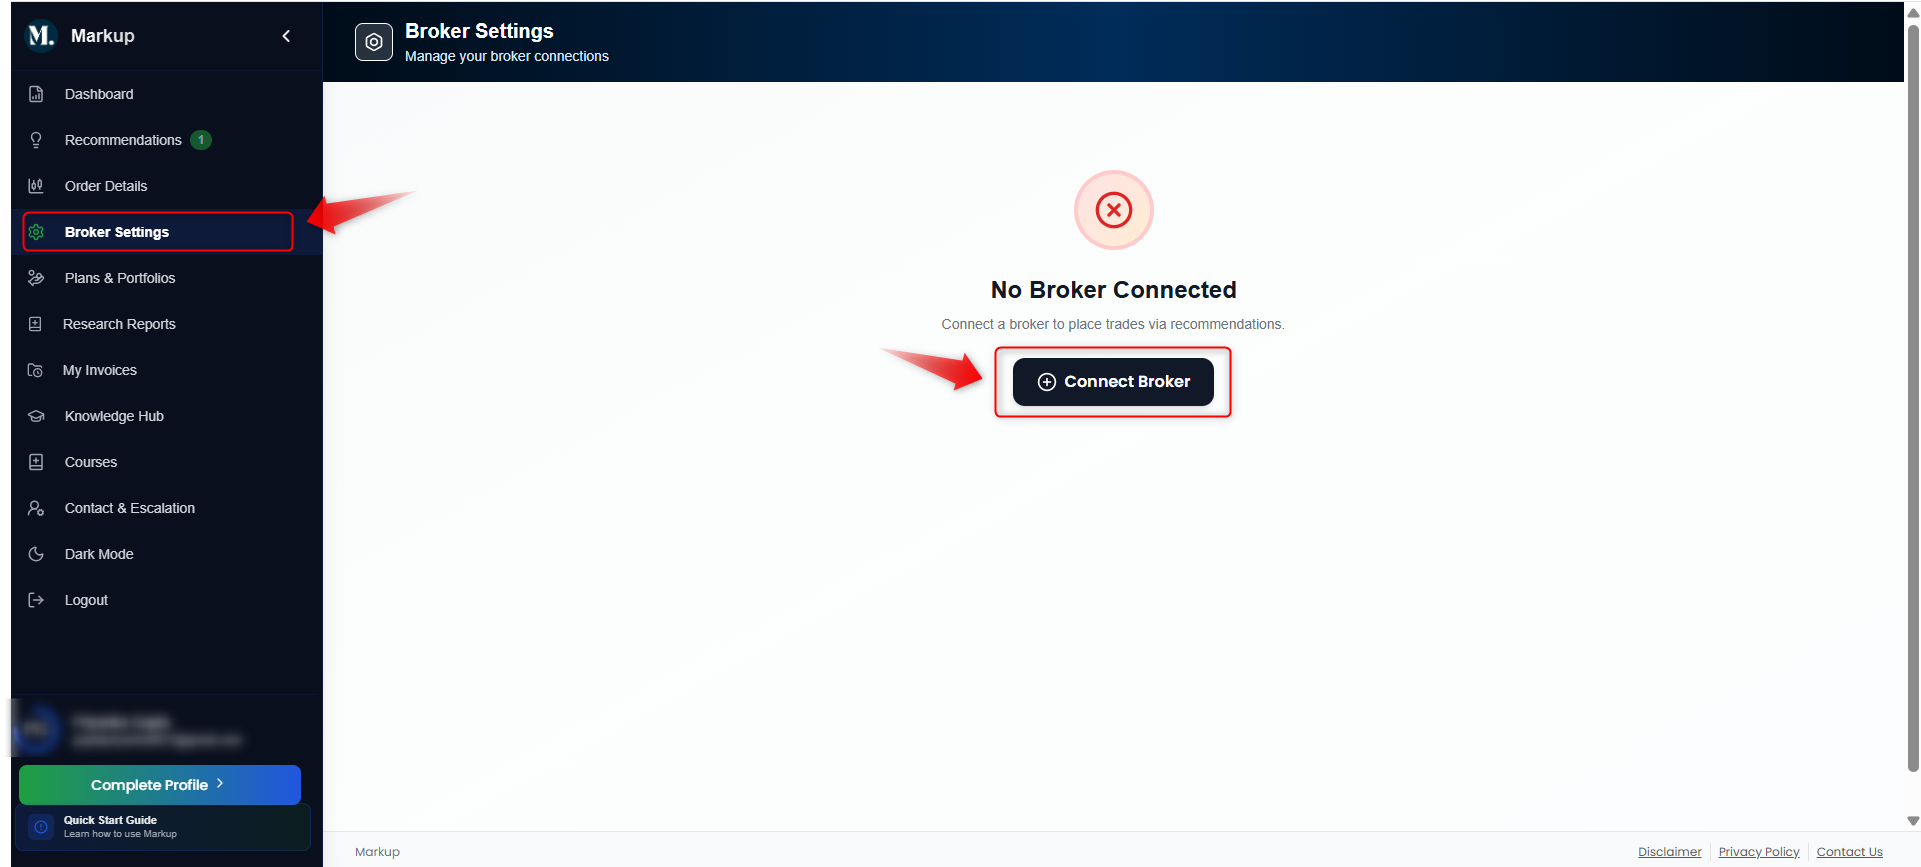
Step 2: Select Zerodha
A disclaimer appears reminding you that trading decisions and actions are yours alone. Select Zerodha from the list of brokers.
Step 3: Log In to Zerodha
You are redirected to the Zerodha login screen. Enter your password.
If you also want to be logged in to Kite Web, tick "Login to Kite Web also," then select Login. For why this matters to keeping your connection active, read: https://support.thenoiselesstrader.com/portal/en/kb/articles/keeping-your-zerodha-session-active-on-markup-club
Step 4: Verify With Your Mobile App Code
Open the Kite mobile app on your phone to generate the 2FA App Code, enter it, then select Continue.
Step 5: Confirmation
You are redirected back to Markup, where a confirmation shows your Zerodha account is linked and ready to place orders on your recommendations.
Zerodha now shows as your connected broker on the Broker Settings page.
A Few Things to Keep in Mind
- Your Zerodha session expiry is shown on the Broker Settings page. Once it expires, select Re-auth to reconnect.
Still Need Help?
Email us at markup.support@markupclub.zohodesk.in and we will help you sort it out.
Email us at markup.support@markupclub.zohodesk.in and we will help you sort it out.